


This process is to register your device for the University of Minnesota’s wired internet access. This process does require you to use a device that has access to the internet, so use your computer on wireless first, your phone, or some other device to access the wireless internet.
The first step in the process is to use above-said device to go to “https://wired.netaccess.umn.edu/cgi-bin/register.pl” or “wired.netaccess.umn.edu” if you don’t want to type in the whole url.
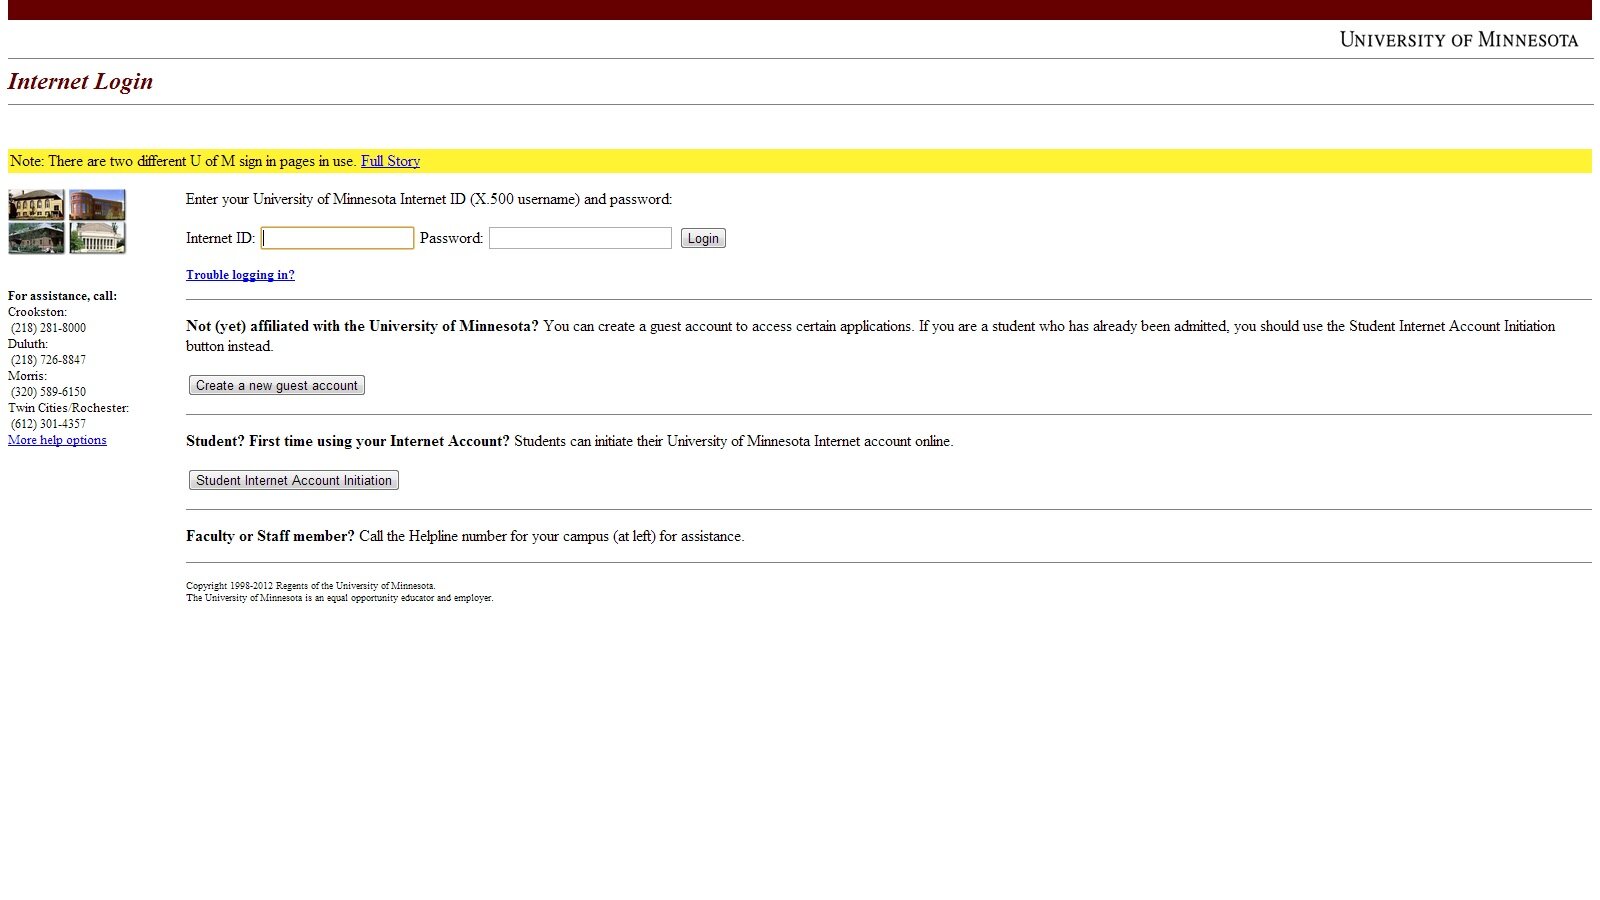
It will then redirect you to the Internet login page, where you will enter in your x500 login and password (your University internet password).
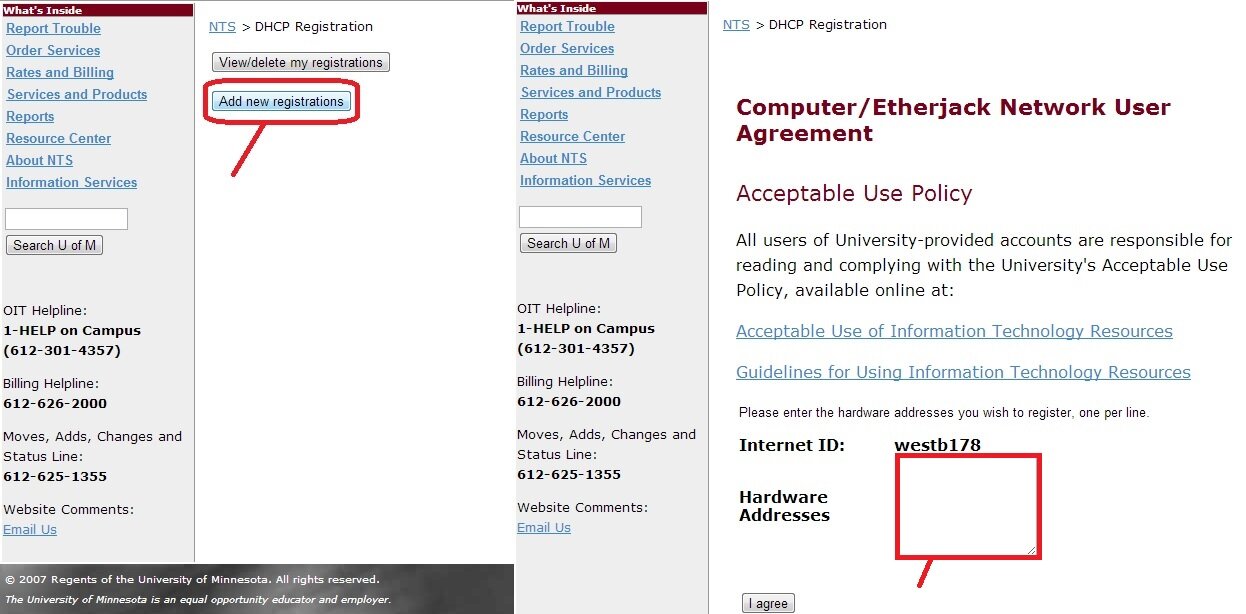
After you log-in, click on Add new registrations, which will bring up a form for Computer/Etherjack Network User Agreement. Read the acceptable use and guidelines (if you’re a good person) and then enter the MAC address for the ethernet port that is currently being used into the text box labeled “Hardware Addresses.”
For those of you that don’t know how find your MAC address for the ethernet port, here are steps you can take to find it for Mac and PC, although there are a multitude of methods for finding this information:
For computers running Mac OSX:
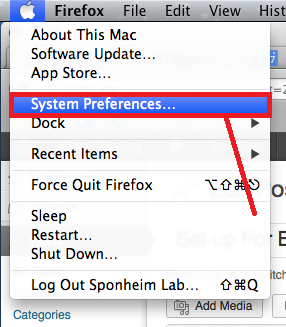
- Click the apple icon on the top tool bar of your computer and click on “System Preferences”
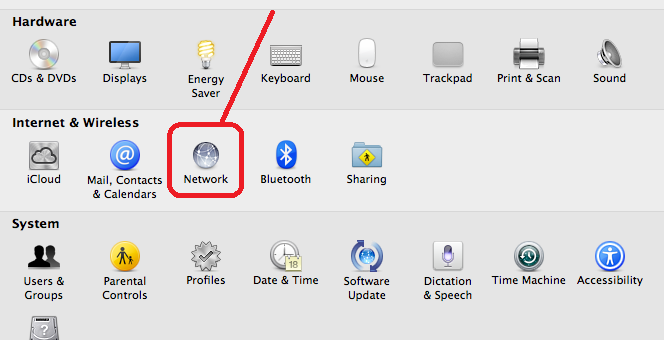
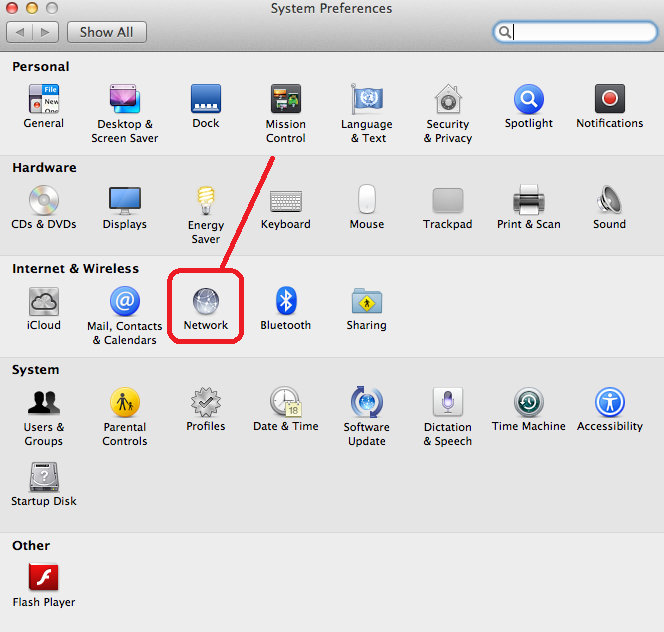
- Under the “Internet & Wireless” section, click on “Network”
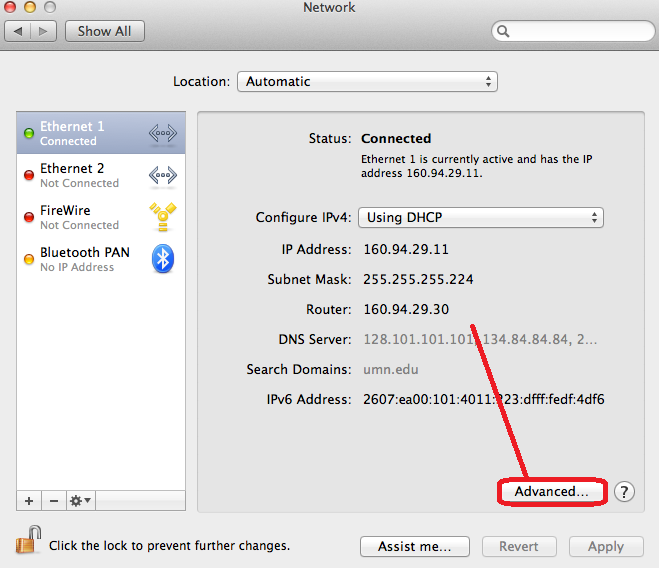
- Click on the Ethernet port that is connected and click on “Advanced…”
- Click on the tab labeled “Ethernet”
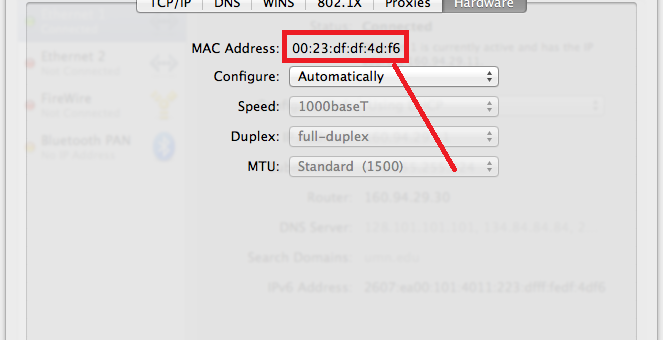
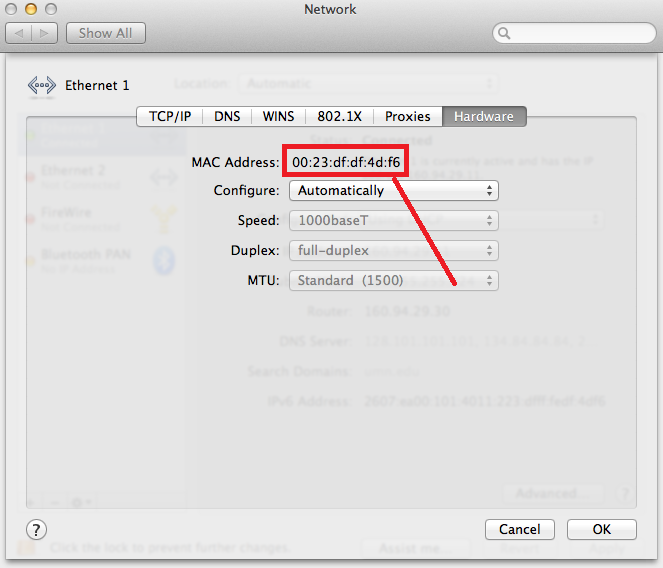
- The MAC address for the ethernet port is listed as “Ethernet ID.” This can be directly copied and pasted into the text box.
For computers running Windows (including Windows 8):
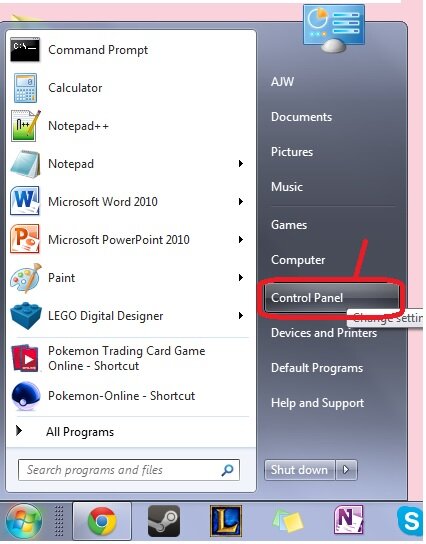
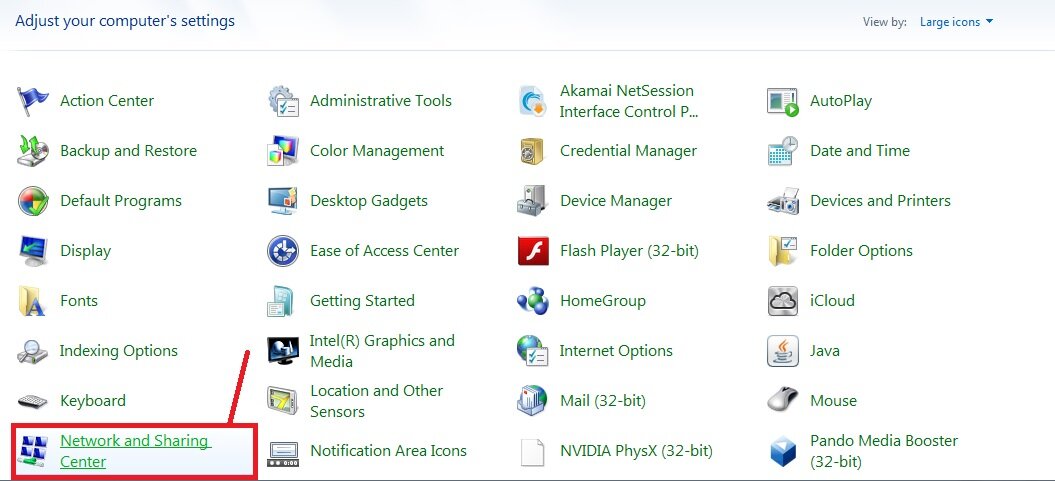
- Go to “Control Panel,” accessed by either clicking on the Windows icon and clicking “Control Panel,” or for Windows 8, simply typing “Control Panel.”
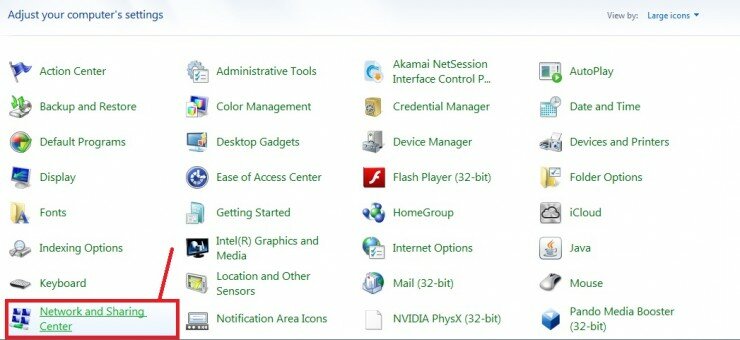
- Go to “Network and Sharing Center”
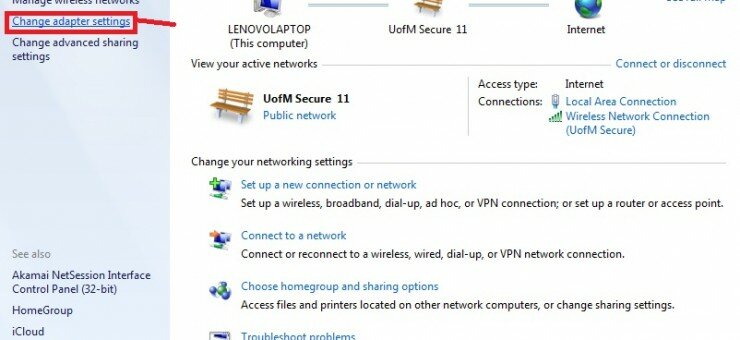
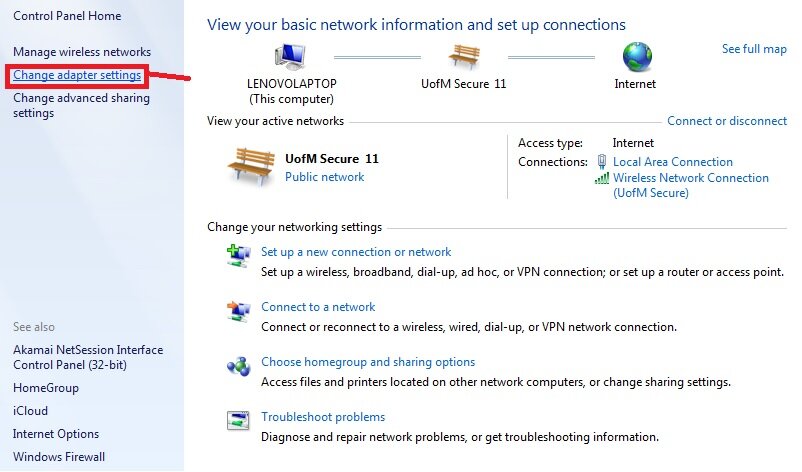
- Click on “Change Adapter Settings” on the sidebar
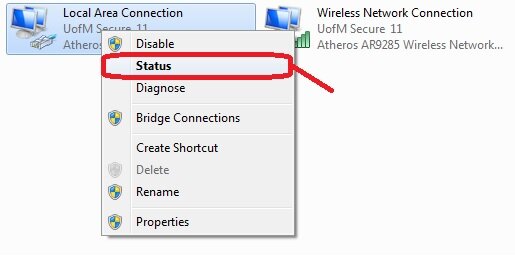
- Right-click on “Local Area Connection” or the ethernet port being used and click “Status” from the drop-down menu
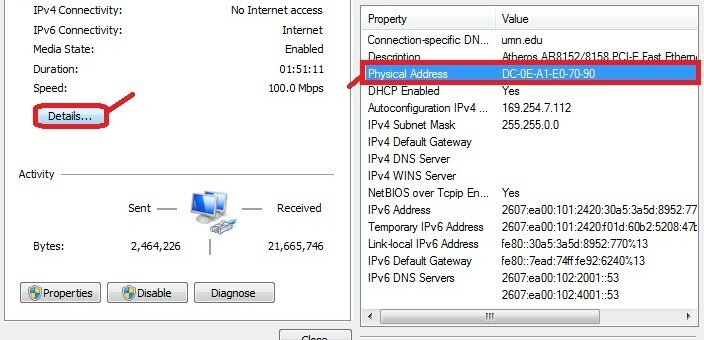
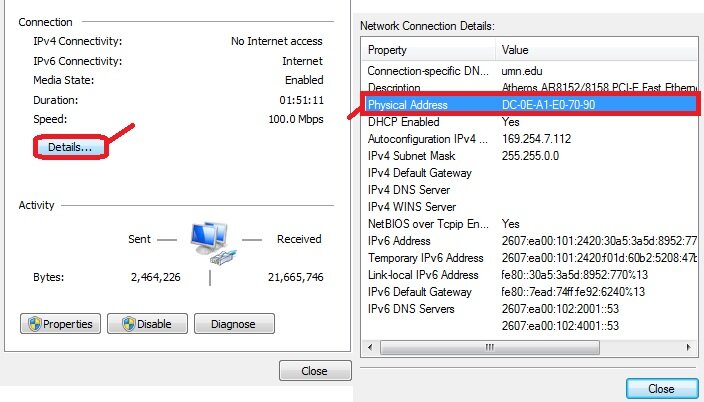
- Click on “Details…” and find “Physical Address.” This is where the MAC address is listed and can be directly copied and pasted into the text box.
After this has been done, click on “I agree” and your device should be registered. It may take a few minutes until your computer is fully registered and can access the internet, to which your University e-mail will be sent your confirmation for registration. Then you are free to use the wired internet!


